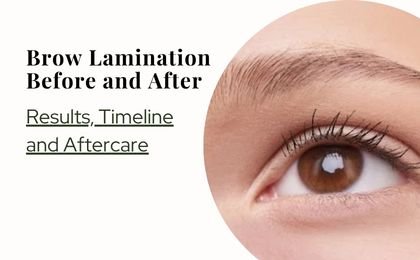
Professional brow lamination can create a noticeable change in the direction, shape and visible fullness of natural eyebrow hairs. Brows that previously looked uneven, downward-growing or difficult to control may appear smoother, wider and more organized immediately after treatment.
When reviewing brow lamination before and after photos, it is important to understand what the service can realistically change. Brow lamination does not add new hairs, tattoo the skin or permanently fill hairless sections. It works by softening and redirecting the natural brow hairs already present.
The final result depends on your brow density, hair length, texture, growth direction, skin condition and preferred style. A person with long, dense brow hairs may achieve bold, fluffy laminated brows, while someone with shorter or finer hairs may receive a softer, more polished result.
At Beverly Microblading Center, every brow lamination Los Angeles appointment is customized at our Westwood studio. Clients visit from Beverly Hills for refined brow styling, from Century City for easier daily grooming and from Brentwood, Santa Monica, Bel Air, Culver City and surrounding Los Angeles neighborhoods for personalized lamination, tint and shaping.
This guide explains realistic before-and-after results, the treatment timeline, aftercare, longevity, costs, common concerns and how brow lamination compares with tinting and microblading.
What Is Brow Lamination?
Clients commonly ask, “What is brow lamination?”
Brow lamination is a temporary professional treatment that makes eyebrow hairs more flexible so they can be repositioned into a smoother, more consistent direction.
The technician typically applies a softening product, brushes the hairs into a customized pattern and then applies a setting product to stabilize the new direction.
Professional eye brow lamination may help improve:
- Downward-growing brow hairs
- Hairs that cross over one another
- Curly or coarse texture
- Brows that appear thinner because hairs overlap
- Uneven arches
- Tails that point downward
- Hairs that do not remain in place with gel
- Visible differences between the two brows
The treatment should be customized throughout the brow. Front hairs may be directed upward, the middle hairs positioned diagonally and the tail hairs smoothed outward.
A professional result should follow the natural brow structure instead of forcing every hair vertically upward.
What Do Brows Look Like Before Lamination?
Before treatment, natural eyebrows may appear:
- Uneven in width
- Flat or downward-growing
- Curly or unruly
- Sparse in areas where hairs overlap
- Difficult to style symmetrically
- Less defined around the arch
- Thin through the tail
- Different in direction between both sides
- Dependent on strong-hold gel
- Untidy by the end of the day
Some clients have enough natural hair but cannot see their full brow shape because the hairs grow downward or lie across one another.
Others have long brow hairs that create fullness but move out of position easily.
During the consultation, the technician should identify whether the main concern is hair direction, color, actual density or missing hair. This helps determine whether lamination, tinting, shaping or permanent makeup is the most suitable option.
What Do Brows Look Like After Lamination?
Immediately after treatment, the brows may appear:
- Fuller-looking
- Smoother
- Wider
- More lifted
- Better organized
- More defined through the arch
- More controlled through the tail
- Easier to brush
- More balanced between both sides
- Glossy or conditioned
The result may look stronger on the first day because the hairs have been freshly positioned and the finishing products are still present.
When tinting is included, the brows may also appear darker immediately after treatment. The color usually softens as the skin and hairs are gently cleansed during the following days.
A successful result should not leave the brow hairs tightly curled, excessively stiff, frizzy or visibly broken.
Why Brow Lamination Results Differ
No two brow lamination before and after transformations are identical.
Several factors affect the finished result.
Natural Brow Density
Dense brows can produce a bold, fluffy finish because more hairs are available to reposition.
Finer brows may still look more organized and slightly fuller, but lamination cannot create the same density as naturally thick brows.
Hair Length
Longer brow hairs often provide more styling flexibility. They can be directed across small gaps and positioned to improve visible width.
Very short hairs may produce a more subtle result.
Hair Texture
Coarse, curly or resistant hairs may require different processing from fine, flexible hairs.
The technician should adjust timing according to hair condition rather than using the same treatment duration for every client.
Growth Direction
Downward-growing hairs often show a dramatic transformation because lamination redirects them upward and outward.
Hairs that already grow neatly may experience a softer change.
Existing Damage
Dry, brittle, bleached or previously overprocessed brows may not be suitable for immediate lamination.
The technician may recommend postponing treatment until the hairs are in better condition.
Desired Style
Some clients want high, fluffy brows. Others prefer a smooth, polished finish.
A Beverly Hills client may request controlled, softly elevated brows, while a Culver City client may prefer a more textured and editorial shape.
What Is Brow Lamination and Tint?
Clients also ask, “What is brow lamination and tint?”
Lamination changes the direction of the natural brow hairs. Tint changes their visible color.
A combined brow lamination and tint treatment may be helpful when the brows contain:
- Blonde hairs
- Gray hairs
- Light or faded tails
- Fine hairs that are difficult to see
- Uneven color
- Sun-lightened areas
The tint can make more hairs visible and increase definition through the body and tail.
The service may also be described as:
- Brow tint and lamination
- Brow tint and laminate
- Brow lamination with tint
- Brow shaping, tint and lamination
Tinting does not create new hair. It enhances the color of existing hairs and may temporarily leave a light stain on the surrounding skin, depending on the product used.
Brow Lamination Treatment Process
Understanding the process helps explain the before-and-after transformation.
Consultation and Brow Assessment
The technician reviews:
- Brow density
- Hair length
- Hair strength
- Growth direction
- Skin condition
- Previous lamination
- Tint history
- Skincare products
- Desired style
- Sensitivity or allergy history
Clients should disclose recent chemical peels, laser treatments, permanent makeup, strong retinoids and previous reactions to tint or hair products.
Cleansing
The brow area is cleansed to remove makeup, oil, sunscreen, skincare products and styling residue.
Arriving without heavy pomade, wax or brow lamination gel can make preparation more efficient.
Shape Planning
The technician discusses how the brows should be directed.
A customized plan may involve:
- Fuller-looking fronts
- Diagonal movement through the body
- A more visible arch
- Smoother tail direction
- Better balance between both brows
- A soft, natural finish
- A more noticeable fluffy appearance
Softening Stage
A professional softening solution makes the brow hairs flexible enough to reposition.
The product should be applied carefully and processed according to hair texture and condition.
Hair Positioning
The brows are brushed into the planned direction.
This step is critical because the placement influences the finished width, arch and overall expression.
Setting Stage
A setting solution helps stabilize the new direction.
The technician monitors the hairs to avoid unnecessary processing.
Optional Tint
When brow tint and lamination are booked together, tint is applied at the appropriate stage.
The shade is selected according to natural hair color, skin tone and desired definition.
Shaping
Waxing, tweezing or careful trimming may be included.
Excessive trimming should be avoided because natural hair length contributes to the laminated effect.
Conditioning and Final Styling
A conditioning treatment may be applied before the brows are brushed into their final position.
The technician then explains brow lamination aftercare and the recommended maintenance schedule.
How Long Does the Appointment Take?
A professional brow lamination appointment usually takes approximately 45–75 minutes.
The appointment may take longer when it includes:
- Customized tint
- Waxing
- Tweezing
- Detailed shaping
- Resistant brow hairs
- Additional consultation
- Conditioning treatment
A careful appointment should not be rushed. Product placement, processing time and customized hair direction all affect the final result.
Brow Lamination Results Timeline
Immediately After Treatment
The brows appear lifted, smooth and freshly styled.
They may look glossy because of the finishing or conditioning product. Tint may appear darker than expected during the first day.
Avoid repeatedly touching or brushing the hairs immediately after the appointment.
First 24–48 Hours
The hairs are settling into their new direction.
Follow the technician’s instructions regarding water, steam, makeup, exercise, skincare and sleeping position.
The brows may initially look more structured than they will after normal cleansing and styling resume.
First Week
Once the initial restriction period has passed, the brows can usually be brushed into a softer or more defined direction.
The tint may begin to soften, particularly if it left color on the skin.
Weeks 2–6
The brows remain easier to manage and style.
A clean spoolie and a small amount of light gel may be enough to arrange them each morning.
Around Weeks 6–8
The laminated effect gradually becomes less uniform as new hairs grow and treated hairs complete their natural cycle.
The technician can assess whether the brows are ready for another treatment.
How Long Does Brow Lamination Last?
Clients frequently ask, “How long does brow lamination last?”
The visible effect generally lasts approximately six to eight weeks.
The common search phrase “how long do brow lamination last” refers to how long the hairs remain easier to direct and style. Results vary from person to person because brow growth cycles and hair textures are different.
The answer to “how long does a brow lamination last?” may be influenced by:
- Natural hair-growth rate
- Brow texture
- Skincare routine
- Cleansing habits
- Steam exposure
- Swimming
- Heavy sweating
- Daily brushing
- Hair condition
- Frequency of exfoliation
- Aftercare quality
The tint usually fades before the laminated shape fully grows out.
Clients who swim regularly in Santa Monica may notice quicker color fading. Century City clients using strong exfoliating skincare should keep those products away from the immediate brow area when possible.
Brow Lamination Aftercare
Good brow lamination aftercare helps maintain a smooth finish and reduces unnecessary dryness.
First 24–48 Hours
Depending on the professional product system used, your technician may advise you to avoid:
- Water directly on the brows
- Steam
- Saunas
- Swimming
- Heavy sweating
- Brow makeup
- Strong skincare
- Exfoliating acids
- Retinoids around the brows
- Rubbing or scratching
- Sleeping face-down
- Pressing the brows into a pillow
- Excessive brushing
- Unapproved oils or treatments
Follow the salon’s specific instructions rather than general advice from social media or a home kit.
After the Initial Settling Period
Once normal care is permitted:
- Brush the brows gently with a clean spoolie
- Style hairs upward and outward
- Clean the area without scrubbing
- Use recommended conditioning products
- Avoid aggressive exfoliation over the brows
- Limit strong skincare directly around the hairs
- Avoid excessive trimming
- Use a light styling gel when needed
A small amount of brow lamination gel can add hold, but many clients need less product than they used before treatment.
How to Style Laminated Brows
Lamination does not permanently lock every hair into one fixed position.
After the initial settling period, you can adjust the brows according to the desired look.
For a Soft Natural Finish
Brush the front hairs slightly upward and the remaining hairs diagonally toward the temples.
This creates fullness without an excessively vertical appearance.
For Fluffy Brows
Brush more of the hairs upward, especially through the front and body.
Avoid forcing the tail hairs straight upward, as this can make the finished shape look unbalanced.
For a Sleek Finish
Use a small amount of clear gel and brush the hairs smoothly along the natural brow shape.
This may be suitable for polished workwear or evening makeup.
Common Brow Lamination Concerns and Solutions
The Brows Look Too Fluffy
The immediate result may appear stronger because the hairs were freshly styled.
After the waiting period, brush them into a softer diagonal direction. Do not soak or flatten the brows prematurely unless instructed by the salon.
The Tint Looks Too Dark
Fresh tint often appears deeper on the first day, especially when the surrounding skin is lightly stained.
It normally softens with gentle cleansing. Do not scrub aggressively, as this can irritate the skin.
The Brows Feel Dry
Dryness may occur when the hairs are naturally coarse, have been previously processed or are not conditioned correctly.
Use only products recommended by your technician. Avoid repeating lamination early or applying a home chemical treatment.
The Hairs Look Frizzy
Frizzy, tightly curled or unusually bent hairs may indicate overprocessing.
Contact the salon for professional assessment. Do not attempt to correct them using a brow lamination kit.
One Brow Looks Different
Natural brow density, growth direction and arch position often differ between sides.
Customized brushing or shaping may improve the appearance. Future appointments can also adjust the processing and positioning plan.
The Result Faded Quickly
Possible causes include:
- Frequent swimming
- Steam exposure
- Strong skincare
- Aggressive cleansing
- Resistant hairs
- Inadequate processing
- Rapid hair growth
- Poor initial aftercare
Speak with the technician before scheduling another treatment.
Some Hairs Are Growing in Normally
New brow hairs were not present during the original service, so they will grow in with their natural direction.
This is expected and gradually makes the result less uniform.
Professional Treatment vs Brow Lamination Kit
A home brow lamination kit may seem convenient, but chemical processing requires controlled placement and timing.
Possible home-treatment problems include:
- Uneven hair direction
- Skin irritation
- Brow breakage
- Excessive dryness
- Frizzing
- Overprocessing
- Underprocessing
- Tint that is too dark
- Product entering the eyes
- Different results on each brow
A professional brow lamination kit is designed to be used according to manufacturer instructions by trained technicians who can assess hair condition and adjust treatment time.
Home users may mistakenly reapply products when the first result appears uneven. Reprocessing too soon can weaken the hairs further.
Professional brow lamination salons also provide customized shaping, tint selection, conditioning and aftercare guidance that a boxed product cannot personalize.
Brow Lamination vs Brow Tint
In a brow tint vs lamination comparison, the treatments solve different problems.
Brow Tint
Tint is best when you want:
- Darker brow hairs
- Better visibility of fine hairs
- More color through the tail
- Increased contrast
- Less daily pencil use
Brow Lamination
Lamination is best when you want:
- Better hair direction
- Smoother brows
- Fuller visible width
- Easier styling
- More control over coarse or downward-growing hairs
When considering brow lamination vs brow tint, you may not need to choose only one. Combining the two can improve both direction and color.
Brow Lamination vs Microblading
A brow lamination vs microblading comparison should consider whether the concern is natural hair direction or missing definition.
Brow Lamination
Lamination:
- Styles existing brow hairs
- Does not tattoo the skin
- Lasts several weeks
- Requires minimal recovery
- Cannot create hair in empty areas
- Can be restyled after settling
Microblading
Microblading:
- Places pigment into the skin
- Creates hair-like strokes
- Can improve areas with missing hair
- Lasts much longer
- Requires a healing period
- Usually includes an initial touch-up
Lamination may suit clients who have enough natural hair but need better control.
Microblading may suit clients who need longer-lasting shape or pigment in sparse sections.
Brow Lamination Cost and Value
Clients frequently ask, “How much is brow lamination?”
The brow lamination cost varies according to:
- Salon location
- Technician experience
- Brow density
- Hair texture
- Product quality
- Tint inclusion
- Waxing or tweezing
- Conditioning treatment
- Appointment duration
- Custom styling
The advertised brow lamination price may cover lamination alone or include tinting and shaping.
When comparing salons, confirm whether the service includes:
- Consultation
- Brow cleansing
- Lamination
- Customized positioning
- Tint
- Shaping
- Conditioning
- Final styling
- Aftercare guidance
The lowest advertised price may not include the full service.
Who Is a Good Candidate?
Brow lamination may suit clients who:
- Have downward-growing brow hairs
- Have coarse or curly brows
- Use strong gel every day
- Want fuller-looking brows
- Want improved hair direction
- Prefer temporary enhancement
- Have natural brow hair available
- Want a fluffy or structured finish
- Are not ready for permanent makeup
- Can follow aftercare instructions
Westwood and Brentwood clients often choose lamination for easier everyday styling. Beverly Hills and Bel Air clients may prefer a polished, controlled result, while Santa Monica and Culver City clients may enjoy a softer, flexible finish.
Who Should Postpone Treatment?
Brow lamination should generally be postponed if you have:
- Broken or irritated skin
- Active eczema or dermatitis
- Psoriasis in the treatment area
- Sunburn
- Cuts, sores or scabs
- Recent chemical peels
- Recent laser treatment
- Unhealed permanent makeup
- Brittle or breaking brow hairs
- A previous lamination that has not grown out
- A known allergy to lamination or tint ingredients
- Unexplained hair loss
- An active skin infection
Tell your technician about prescription acne medication, retinoids, exfoliating acids, recent waxing and previous reactions to hair dyes.
A patch test may be recommended, but it cannot guarantee that a reaction will never occur.
Frequently Asked Questions
What Is Brow Lamination?
Brow lamination is a professional treatment that softens, redirects and sets natural eyebrow hairs into a smoother, more organized position.
What Do Brow Lamination Before and After Results Show?
Results commonly show fuller-looking brows, smoother hair direction, improved arches and easier daily styling.
What Is Brow Lamination and Tint?
Lamination changes the direction of the hairs, while tint darkens their visible color. Combining both creates a more defined result.
How Long Does Brow Lamination Last?
Results generally last around six to eight weeks, depending on hair growth, texture, skincare and aftercare.
How Much Is Brow Lamination?
Pricing depends on the salon, technician experience, product quality and whether tinting, shaping and conditioning are included.
Can I Use Brow Lamination Gel After Treatment?
Yes, after the initial settling period. A light gel can help maintain the preferred direction, although less product is usually needed.
What Is Brow Tint vs Lamination?
Tint changes hair color. Lamination changes hair direction and shape. The services can be performed separately or together.
Is Brow Lamination Better Than Microblading?
Neither treatment is universally better. Lamination temporarily styles natural hair, while microblading adds longer-lasting pigment strokes to the skin.
Can I Correct Uneven Results With a Brow Lamination Kit?
No immediate reprocessing is recommended. Applying another chemical treatment too soon may weaken the hairs. Contact the salon for an assessment.
Where Can I Book Brow Lamination in Los Angeles?
Beverly Microblading Center provides customized brow lamination in Los Angeles from its Westwood studio, serving Beverly Hills, Brentwood, Santa Monica, Century City, Bel Air, Culver City and nearby neighborhoods.
Reveal the Full Potential of Your Natural Brows
Professional brow lamination Los Angeles services can create smoother, fuller-looking brows while making daily styling faster and easier.
Book your appointment at our Westwood studio for customized brow lamination, tint and shaping designed around your natural brow density, hair direction and facial features.
Book Your Free Consultation
Get expert advice and a personalized treatment plan—no commitment required